Can You Change Hardwood Floor Color? A How-To Guide
Table of Contents
Understanding the Hardwood Floor Refinishing Process
Refinishing vs. Staining: What's the Difference?
Can You Stain Over Existing Finish?
How to Choose Wood Floor Stain for Your Space
Wood Species and Color Saturation
Stain Compatibility Matrix: What Actually Works
Testing Stain on Hidden Samples
Hardwood Floor Sanding Tools and Materials You'll Need
Abrasive Pads and Grit Progression
Stain Application and Topcoat Options
No-Sand Color Change: When It Works and When It Doesn't
Gel Stains and Hardwax Oils as Alternatives
Durability Expectations for No-Sand Methods
DIY vs. Professional Floor Refinishing: What's Right for You
Cost-Benefit Analysis: Equipment, Time, and Hidden Factors
When DIY Makes Sense
When Professional Refinishing Makes Sense
Common DIY Mistakes to Avoid
Step-by-Step: Refinishing Your Hardwood Floors
Step 1: Assess Your Current Floor and Finish
Step 2: Prepare and Clean the Surface
Step 3: Sand or Strip the Existing Finish
Step 4: Apply Your Chosen Stain
Step 5: Apply Topcoat and Allow Curing Time
Conclusion
Frequently Asked Questions
Last Updated: September 19, 2026
Yes, you absolutely can change hardwood floor color. Whether you're refreshing a tired finish or transforming your space entirely, hardwood floors offer remarkable flexibility. The question isn't whether it's possible, it's which method makes sense for your specific situation. At Northern Escapes Services, we help homeowners across Northern Ontario understand their options and execute color changes that last.
Most hardwood floors can be restained, but success depends on your current finish, wood species, and effort level. Some approaches require full sanding and refinishing; others skip that step. Understanding which method fits your situation is key.
Understanding the Hardwood Floor Refinishing Process
Refinishing removes the old finish and applies a new one. Staining gives the floor its color. These steps work together but aren't the same: refinishing strips protective layers to expose raw wood, then you apply stain and topcoat for protection.
Refinishing vs. Staining: What's the Difference?
Refinishing removes the old protective finish completely. Staining applies color to the wood itself. You can refinish without staining (keeping the natural wood tone), but you can't stain effectively over a sealed finish.
Refinishing is the prep work; staining is the color choice. You need refinishing to change color dramatically, stain won't penetrate sealed wood. It takes longer and costs more, but it's the only way to guarantee a lasting color change, as the new finish bonds directly to bare wood.
Can You Stain Over Existing Finish?
No, not effectively. Stain is designed to soak into raw wood. Sealed finishes block absorption. Any stain applied to a sealed surface sits on top and flakes off quickly.
Gel stains and no-sand solutions exist for sealed wood, but they're colored topcoats, not true stains. They work for minor adjustments, not dramatic changes. For reliable results, strip the old finish first.
How to Choose Wood Floor Stain for Your Space
Stain color depends on wood species, the stain itself, and application method. The same stain looks dramatically different on oak versus maple: oak's large pores absorb stain unevenly for rich, varied color; maple is denser, takes stain uniformly, but resists deep saturation. This matters enormously when choosing color.
Wood Species and Color Saturation
Different woods accept stain differently, and understanding this upfront prevents costly mistakes:
Oak absorbs stain readily with natural color variation. It accepts light and dark stains well and is forgiving for first-time stainers.
Maple resists stain penetration due to tight grain.
Stain Compatibility Matrix: What Actually Works
Before buying stain, cross-reference your wood species with your desired color outcome:
Wood Species | Light Stain Result | Medium Stain Result | Dark Stain Result | Blotch Risk | Notes |
Oak | Golden, warm | Rich amber | Deep brown | Low | Most forgiving; shows grain beautifully |
Maple | Pale, thin | Medium brown | Dark brown (2-3 coats needed) | Medium | Requires conditioner for even results |
Walnut | Medium tone | Deep brown | Nearly black | Very low | Already dark; stain enhances depth |
Pine | Uneven, blotchy | Blotchy medium | Blotchy dark | High | Use conditioner; expect variation |
Ash | Light golden | Medium brown | Dark brown | Low | Moderate porosity; fairly predictable |
Hickory | Warm tan | Rich brown | Deep espresso | Low | Natural variation adds character |
Testing Stain on Hidden Samples
Always test before committing to the entire floor. This is non-negotiable.
Obtain a test sample from leftover flooring, a closet piece, or your flooring supplier.
Prepare identically to your floor using the same grit progression (36 → 80 → 150).
Apply stain using your intended method (brush, rag, or sprayer).
Apply the same number of coats as planned for the floor.
Observe in multiple lighting conditions over 24-48 hours; wet stain looks darker than dry.
Check the dried finish after full curing before deciding.
Hardwood Floor Sanding Tools and Materials You'll Need
Full refinishing requires specific tools. You'll need sanders, abrasive pads, stain, and topcoat. Renting equipment is cheaper than buying if this is a one-time project.
Abrasive Pads and Grit Progression
Sanding starts coarse and finishes fine. Coarse grits (36-60) remove old finish quickly. Medium grits (80-120) smooth the surface. Fine grits (150-220) prepare for stain.
Stain Application and Topcoat Options
Apply stain with a brush, rag, or sprayer. Brush application gives you control but shows brush marks. Rag application is slower but blends marks. Sprayers are fastest but require practice.
No-Sand Color Change: When It Works and When It Doesn't
Not every color change requires full sanding. If your current finish is intact and you want a subtle shift, alternatives exist, but they work only for minor adjustments, not dramatic changes.
Gel Stains and Hardwax Oils as Alternatives
Gel stains are thick, pigmented products that create a colored layer on sealed wood, working for light changes. Hardwax oils combine oil and wax for color and protection with easier application and less sanding prep. Both skip full refinishing, saving time and money, but durability is lower and they wear faster in high-traffic areas.
Durability Expectations for No-Sand Methods
No-sand methods last 3-5 years; full refinishing lasts 7-10+ years. Use no-sand methods in low-traffic areas like bedrooms; choose full refinishing for high-traffic spaces.
DIY vs. Professional Floor Refinishing: What's Right for You
This decision depends on skill, time, budget, and risk tolerance. DIY saves money upfront but demands precision and extended time. Professional refinishing costs more but delivers guaranteed results and faster turnaround.
Cost-Benefit Analysis: Equipment, Time, and Hidden Factors
DIY Refinishing Costs
Time Investment
DIY refinishing spans 2-4 weeks calendar time (44-68 active hours): preparation, sanding across multiple days, stain application and curing, topcoat application with curing between coats, and cleanup. Working weekends only stretches this to 4-8 weeks, during which the room is unusable.
Hidden DIY Costs
Professional Refinishing
When DIY Makes Sense
Choose DIY if: you have a small room (under 200 sq. ft.) with simple geometry, 4-8 weeks of flexible schedule, comfort with physical labor, prior project experience, ability to redo work if needed, and low-traffic use. DIY is cost-effective only if you avoid major mistakes.
When Professional Refinishing Makes Sense
Choose professional refinishing if: your floor is large (over 400 sq. ft.) or complex, you need quick turnaround, the space is high-traffic, you want guaranteed results, you lack stamina for 40+ hours of work, or your finish is heavily damaged or contains lead paint.
Common DIY Mistakes to Avoid
Skipping grit progression. Jumping from 60-grit directly to 150-grit leaves visible scratches from the coarser grit. Each grit removes scratches from the previous one. Taking time with 36 → 60 → 80 → 120 → 150 progression prevents this.
Step-by-Step: Refinishing Your Hardwood Floors
Here's how to refinish your own hardwood floors. This process takes patience, but the result is a completely transformed floor.

Step 1: Assess Your Current Floor and Finish
Look at your floor closely. Is the finish peeling or flaking? Does it have deep scratches or water damage?
Step 2: Prepare and Clean the Surface
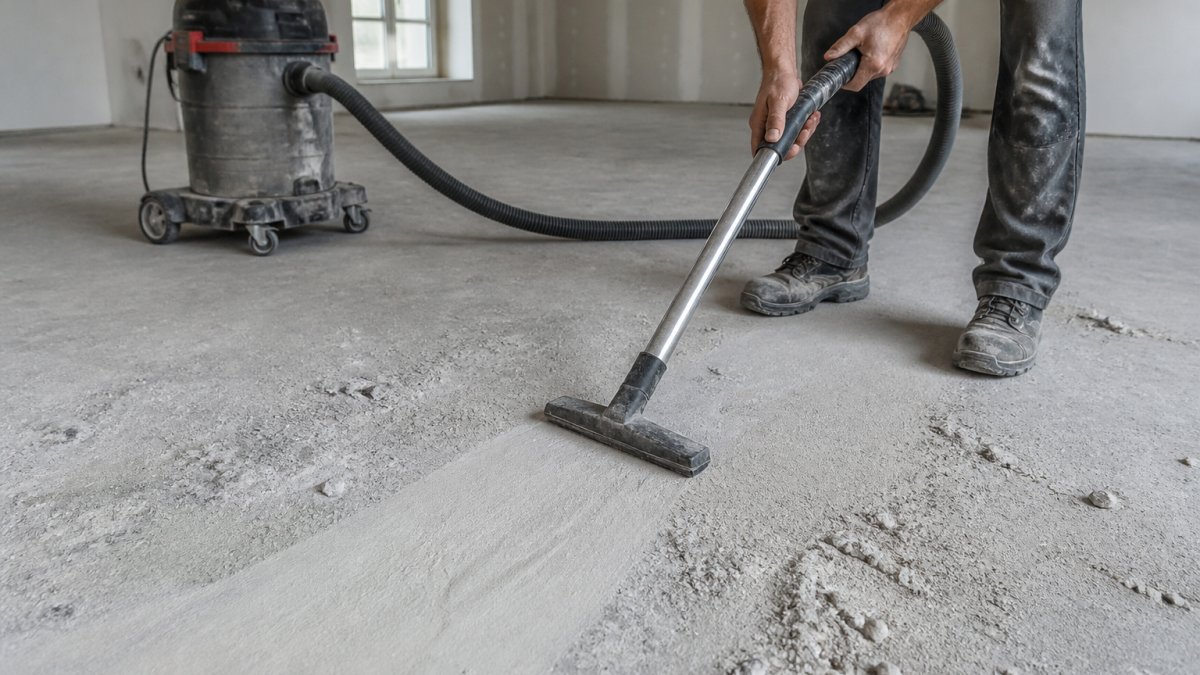
Remove all furniture and trim baseboards if possible. Baseboards protect the wall but make sanding harder. Removing them lets you sand right to the edge.
Step 3: Sand or Strip the Existing Finish
Sanding is faster than chemical stripping. Start with 36-grit or 60-grit abrasive. Sand in the direction of the wood grain.
Step 4: Apply Your Chosen Stain
Stir stain thoroughly. Apply with a brush, rag, or sprayer. Work in sections. Maintain a wet edge so sections blend together.
Step 5: Apply Topcoat and Allow Curing Time
Apply topcoat once stain is completely dry. Use a brush or applicator pad. Apply thin, even coats.
Conclusion
Changing hardwood floor color is absolutely possible, and you have real options. Full refinishing delivers the most dramatic and durable results. No-sand methods work for minor adjustments. The right choice depends on your wood species, current finish condition, and how much time you have.
Frequently Asked Questions
Is it possible to change the color of hardwood floors without sanding?
Yes, but with limitations. Gel stains and hardwax oils can darken or modify color over existing polyurethane without full sanding, provided the current finish is in good condition and not heavily worn. However, these methods offer less dramatic color change and shorter durability compared to traditional refinishing. For significant color shifts or high-traffic areas, sanding remains the most reliable approach to ensure even stain penetration and lasting results.
What is the hardwood floor refinishing process timeline?
A complete hardwood floor refinishing process typically takes 5-7 days for a standard room. This includes surface preparation (1-2 days), sanding with progressive grit progression (1-2 days), stain application (1 day), and topcoat curing (2-3 days). Curing time is critical, floors need 3-7 days before normal foot traffic and up to 2 weeks before furniture replacement, depending on the polyurethane or hardwax oil used. Professional contractors manage this timeline with detailed project tracking to minimize disruption.
How do I know if my hardwood floors can be refinished?
Most solid hardwood floors can be refinished multiple times, but engineered hardwood has limits based on wear layer thickness. Check your floor's condition: if the wood shows deep gouges, water damage, or excessive wear, refinishing may not fully resolve the damage. Assess the finish by applying water, if it beads, the seal is intact. If you're unsure about your specific wood species or floor condition, a professional inspection provides clarity on whether refinishing will deliver the color change you want.
What's the difference between staining and tinting hardwood floors?
Staining involves sanding the floor to bare wood, then applying pigmented stain that penetrates the wood grain, offering rich color saturation and durability. Tinting (or toning) typically refers to adding color over an existing finish using gel stains or water-based tints, which sit on the surface rather than penetrating. Staining provides more control over final color and longer-lasting results, while tinting is faster but offers less dramatic change and shorter durability in high-traffic areas.
Get Started Today
Comments